|
BETTER LIGHT'S 9th "Almost Annual" OWNERS CONFERENCE
June 17th – 18th, 2010 Location: Better Light Offices & Studios, San Carlos, California |
|||||||||||||||||||||||||||||||||||||||||||||||||||||||
|
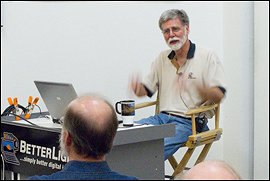
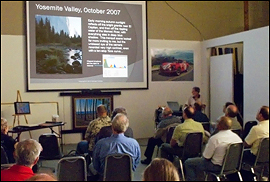
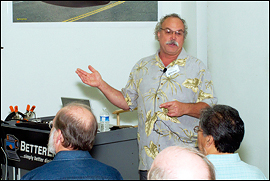
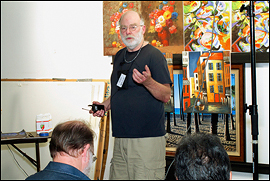
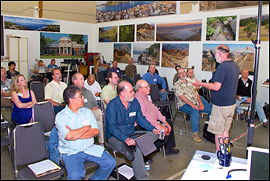
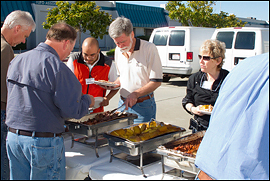
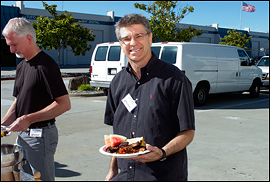
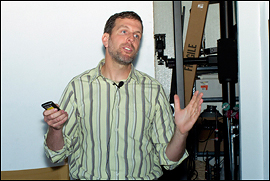
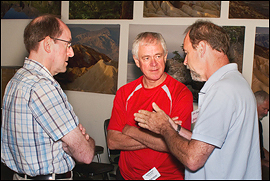
Sometimes Less is More... Despite the sudden economic downturn in late 2008 and into 2009, the 2009 Conference had an attendance only a few percent down from our best years. Our expectations were high for the 2010 Conference, thinking we should meet or exceed the previous year’s participation. However, when the dates for the 2010 Conference were posted on the Forum it seemed like the announcement fell on deaf ears. For weeks the usual buzz and questions about the Conference was absent and the Forum posts were much more concerned with profiles, printer inks and canvas coatings. “Hey…you guys”! What was going on? It took some pretty blunt bulletins to the Forum to get some feedback on the Conference and take a poll of who was still interested in having an event in 2010. Strangely enough for as many emails that we received blaming the economy for not being able to attend, we had just as many people that were too busy or they had jobs booked for the week of the event. We received enough positive feedback to continue with the plans for the June meeting…and we are glad that we did. Our attendance was one of our lowest ever, but there was all of the energy and exchange of knowledge as there ever was…in fact, it seemed that the entire event was more relaxed and a very comfortable environment for learning. Attendees came from near and far, so distance and travel expense was not always a problem when there was a trust that the knowledge and inspiration gained would be an emotional and business benefit. Owners came from as far as Guatemala, Nova Scotia, New England, Texas, Hawaii and throughout the West Coast. A special “thank you” is due to our speakers. These owners stepped forward to share their photography and ideas with the group and move us all to a deeper understanding of the photographic and business opportunities that the scanning back provides us. For the first time, Better Light and Archetype Digital Imaging Alliance sponsored full-day classes before and after the Conference. On the Wednesday before, I taught a class on ViewFinder & Camera Profiling Techniques and on Saturday, Master Photographer and noted industry speaker, Randy Hufford from Maui, presented a fact-filled program on Tools and Techniques for the Perfect Print. As a bonus, we had a preview to a new program he created The Creative Advantage for Creating Profit offering ideas to use creative thinking and new techniques to set you apart from the competition and increase your business even in these tough times. The Better Light Conference is the only event where you can meet with extremely skilled photographers using scanning backs for the majority of their work. It is a great bargain and a valuable resource to gain new ideas and knowledge to improve your work and get inspired to try something new that could attract new clients and build your business. I hope this Conference report will give you a little insight into our annual event and tempt you to join us for the next session in 2011. This year was unique because of our full-day class on Wednesday prior to the start of the Conference on Thursday…so it seemed like we were way too prepared while setting up on Tuesday. We got up to speed quickly on Wednesday with a small class of about eight students…a perfect size group for the in-depth coverage of the ViewFinder software and techniques for the right exposure, lighting, contrast control and ICC profiles. At the end of the day, we held our traditional welcome reception at the Marriott Fairfield Inn in San Carlos. This has been a popular and well-attended event with a chance to meet some new people and renew friendships from previous Conferences. The lobby was filled with Better Light users sharing war stories, equipment tips, and other industry gossip for hours. The group splintered off to neighborhood restaurants to continue conversations and do some additional wine tasting. As the group gathered on Thursday morning, we were ready to officially launch the 9th “Almost Annual” Owners Conference. Following introductions, Mike Collette, “our fearless leader” and inventor of the Better Light Scanning Back, began his keynote presentation on "Extreme Makeovers". The program was an extension of his “Wide Dynamic Range” topic from 2009 where he introduced a Ten-Stop S-Curve to control the extreme brightness values in landscape photography (Mike’s favorite activity). He used three examples to demonstrate many ways to modify and enhance images, dealling with extremes of contrast, excessive noise, motion artifacts, lighting changes, and imperfect focus. The PDF slideshow can be downloaded to give you a pretty full explanation of the steps involved to refresh your memory if you attended the Conference or to get you started if you missed Mike’s program. Click here to download the PDF presentation (PDF 12 MB). Mike also introduced his new self-published book, Collected Light that he created with the online services of blurb.com. The book is a series of Mike’s landscape photographs and an example of a very affordable marketing tool to promote your photography and large print sales. See the Speakers’ Tips Page for more information. RANDY HUFFORD, Limited Editions Maui, Kula, Maui, HI RANDY HUFFORD, Institute of Visual Arts, Kula, Maui, HI He has a passion for fine art photography and sales of his own work beyond his work in copying and printing art for his clients in Maui. In his pursuit for perfection and as a prolific promoter, he has developed a number of products to increase his quality and productivity, and with the help of his father has brought them to market – they include the R&R Copy Wall and 8 ft. fluorescent copy lighting, the “Dual Edge Ripper”. He also published a series of training DVDs with Software Cinema on “The Perfect Print” and hosts a series of seminars on the beautiful island of Maui with some of the photo industries most popular speakers. Randy discussed his “Workflow Tips for Large Format Scanning” sharing some of the equipment modifications and techniques he has used to make his copy work more efficient. One of the most simple, but overlooked considerations is to match the height of the camera to the main operator of the camera — it saves the photographer from constantly bending over to align the image and focus the camera. To save time in sizing the image and alignment Randy created a rolling cart on rails to support his camera. Moving the cart back on the rails speeds up the change for different sized art without the hassle of checking parallel alignment each time. His R&R Copy Wall that is adjustable to handle all sizes of originals regardless if they are framed, on stretchers, or watercolor paper simplifies the positioning of the artwork. The center section is magnetized to quickly mount paper originals or small objects. See Speakers’ Tips Page. He has overcome most of his lighting issues with two 8-foot tall fluorescent light boxes that provide a diffused broad lighting to evenly illuminate all types of originals without cross-polarization. The lights are 5000°K and make a perfect viewing booth to examine the image on his Eizo calibrated monitor and use operator intervention in optimizing the tones and quality to match the original. “As Better Light owners we should take pride in the art and craft of our art reproduction work,” Randy encouraged. “We are not just technicians…it’s an art to how we fine tune the image and make adjustments for a “perfect” reproduction of our customer’s original art”. There are decisions to be made in each job — some scientific, some visual — and in most cases, we must be willing to play with contrast and curves to optimize the results. The objective is to have fewer tests to an exact match. After we have taken the “scientific” steps by the numbers to set neutral balance, exposure, and basic contrast, the craftsmanship comes in as we make the fine tuning adjustments to get a really close visual match on the monitor. Scanning is an art! With experience we can achieve even better quality. EDGAR EDUARDO SACAYON, FLAAR, Guatemala Eduardo is Director of Digital Photography of FLAAR (Foundation for Latin American Anthropological Research) based in Guatemala. His “day job” is to research and test the latest digital technologies appropriate to preserve and document cultural heritage artifacts in general and specifically for the pre-Columbian Mayan civilizations in Guatemala. This information is shared on the extensive www.flaar.org website. Last year Eduardo attended his first Conference and during his trip to San Francisco also visited SF MOMA for an exhibit of Ansel Adams photography. He was so inspired by the Conference speakers and Ansel Adam’s work that he returned to Guatemala to do some landscape photography. He captured some amazing pre-Hispanic ruins with the Pano/WideView™ adapter and the scanning back without the infrared filter on the lens. His photography was done with a mix of infrared and visible light. “This way you can see what you are shooting and still get some unique results”, Eduardo said. “The Better Light sensor is very sensitive to infrared, so in bright daylight I had to use a polarizing filter on the camera lens for neutral density to have a manageable exposure. I actually preferred cloudy days because the light was so even.” he added. When using the panorama adapter, pre-visualization is essential. Consider the distortion from wide angle lenses and select your camera position for the best composition of the dominant image elements…from there it is trial and error for the most dramatic photograph of the scene. Many locations can be further enhanced with the use of HDR (high dynamic range) capture techniques. Shooting at least one exposure for the brightest highlights (such as the cave entry in the example) and another for the shadow values will preserve details and dramatically extend the range of tones in your image. In post-processing, Eduardo prefers to use Photoshop’s Channel Mixer method to convert the images to grayscale, but other tools can also be used to suit your creative style. He uses some of the luminance masking techniques from Mike’s 2009 program (see PDF slide presentation) to control and enhance contrast of specific areas of the photograph. Eduardo’s presentation can be downloaded as a PDF file (14.4 MB). Just before the Conference, Eduardo learned that 11 B&W infrared panoramas from this presentation would be exhibited at Photokina 2010 in Cologne, Germany. JOHN PAULSON John Paulson Photography, San Jose, CA Making major business transitions has been something we all have faced over the past years as digital technology has dramatically impacted the entire graphic arts industry. John Paulson had made one of the toughest transitions from a studio doing almost 80% weddings to now having a dominantly commercial studio business. In today’s market, more than ever, you have to be versatile — doing more things for your clients. The state of the industry has required us to be more “general practitioners” than specialists in order to compete and often the sales tools we used to attract one type of business can be modified and updated to search out opportunities in new markets. John used a variety of email newsletters, postcard mailings and even an occasional “freebie” to book a wedding or attract family portrait sittings. These same tools were redesigned and directed at different prospects to gain new client relationships. “It seems that all aspects of the photography business are experiencing lower budgets and many levels of competition (some good…some bad) so we need to fight harder for jobs. As professional photographers, we have to let our prospects know that we do the kind of photography they need and show them the unique advantages we offer.” John added, “Don’t be afraid to get your name out there…they can’t hire you if they don’t know who you are.” Brochures, postcard mailers, a solid portfolio, and a printed mini-portfolio book are all tools that can be used to search out prospects and keep in touch with past and existing clients. “Don’t forget the internet…your website is your 24/7 sales rep, and should investigate appropriate social networking tools such as blogs, Facebook, Twitter, LinkedIn and other internet sites that reach the industries you want to get jobs from,” John emphasized. Creating your own fine art photography can provide a creative outlet, but can also be used for the studio marketing to boost the public image of the studio. Do what you can to get displays in public places such as restaurants, model homes, or doctor’s offices. Getting your work into art galleries takes more work to accomplish, but might even generate some sales as well as the public exposure. One other idea was to participate in community auctions as fundraisers. Those providing items to bid on get lots of exposure. Once you have a qualified prospect, it doesn’t hurt to invest a little into turning that lead into a paying job. John has used things as simple as pens with his logo, phone and website as a leave-behind gift, or in special situations offered a certificate for a free family portrait session to influence a decision maker. In closing he suggests to always look for ways to help your clients do their job better. John's presentation is available for download (PDF 2.3 MB). GEOFF KILMER Photoworks Creative Group, Charlottesville, VA Photoworks is a full service visual marketing communications group that provides giclée fine art reproduction, commercial product & location photography, design, printing and display solutions to their clients. Geoff’s company is successful because of their versatility and he shared some details of client projects from posters to murals for Charlottesville’s Art in Place outdoor exhibits. Commercial photography is at the heart of the business which supports the needs of Photoworks creative department for brochures and trade show exhibits. Clients that come to the company for photography can also take advantage of the graphics services offered. Much of the product photography is done with the Better Light, especially when large reproductions for posters or exhibits are required. Geoff and his team have sought out opportunities with historic properties in the area to photograph the locations for permanent archive records as well as other uses in exhibits and posters to sell to visitors. One example Geoff described was Thomas Jefferson’s estate, Monticello. “A big name photographer from Washington DC came in to shoot the home, but could not deliver the resolution needed for display prints,” Geoff added. “We then had the opportunity to shoot the property ourselves with the Better Light and provided a 5 ft. x 10 ft. display print for the visitor center. Photoworks retained the rights and setup a royalty deal with Monticello to sell posters in the gift shop…an excellent way to increase the billing on a job and extend the income generating life of the photograph. To make their photography on location a little easier, Photoworks uses a Mamiya RZ67 camera body with the Better Light adapter to mount the scanning back. It’s faster and lighter than working with the 4x5 view camera, but does sacrifice some of the potential imaging area. The Pano/WideView adapter is used in many of his location photographs. Other notable projects have included the Blenheim House in Fairfax, Virginia to photographic all angles of the attic and make a life-size reproduction to preserve civil war era graffiti; the Blue Ridge Parkway Project with photographs of the beautiful mountain scenes for wall displays; and the Virginia State Capital (designed by Thomas Jefferson) to record all interior detail for reference during and after a major renovation and as a permanent architectural record. University sports present good opportunities for photography. They often have budgets and the need to create positive impressions to attract top athletes. Photoworks has a good relationship with the University of Virginia and provided a number of wall murals for the sports offices and locker room, indoor and outdoor banners, and also several impressive sports stadium posters. The Virginia Basketball poster (see photo on tips page) was created from numerous Better Light scans of the stadium on the day of a big game. The best crowd sections were selected from multiple images to create the final composite. The floor action was taken with a Nikon D3 to top the movement. “We just keep thinking of who we can sell our Better Light scans to,” Geoff emphasized, “and that leads to more products we can sell in the form of outdoor banners, trade show displays, and posters. Why not broker printing or sell your photos wholesale if you can generate more income from the same image.” Geoff’s PDF presentation is available online (PDF 6.5 MB). LARRY GUYER, A la Carte Digital Studios, Foster City, CA There are times when we need to rely on polarizing filters when scanning art…but why are the results often so disappointing? This program was intended to increase the understanding of what is happening to our light, the tones of the image, and the dynamic range of our photography when we use these filters. Since there is almost no information available on the issues of cross-polarization related to copying artwork, this became the quest…hoping that with more knowledge we can make better decisions and get the best quality possible from cross-polarized scans of art. However, it is still a work in progress. Removing annoying and distracting glare in our photography is the primary use of polarizing filters. “We think about specular reflections and glossy surfaces when polarizing is mentioned, but we forget about the effect of polarization on matte surfaces,” Guyer noted. “Matte surfaces are really just micro-textured surfaces reflecting many tiny specular highlights that wash out the saturation and “fogs” the clarity of the detail.” There are a number of situations that we can control to minimize the need for cross-polarization. 1) Positioning the lights has an effect on how much “veiling glare” we might see on the edges of a painting. The angle and distance of the lights relative to the subject will vary results. 2) The size and type of light unit will change the specularity of the highlights, seen especially on varnished canvas. Parabolic reflectors will create strong, bright speculars, but maintain good saturation of colors. Fluorescent light fixtures, softboxes, or large diffusion panels will soften the intensity of the highlights, but may begin to create additional veiling glare over part of the subject, reducing the vibrance of color. 3) Working farther from the subject with a longer focal length lens on the camera will also reduce glare. Ron Finley who provided a PDF summary of the topic for downloading discussed this subject at our 2007 Owners Conference. Several interesting conclusions were drawn from the testing:
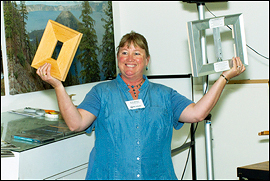
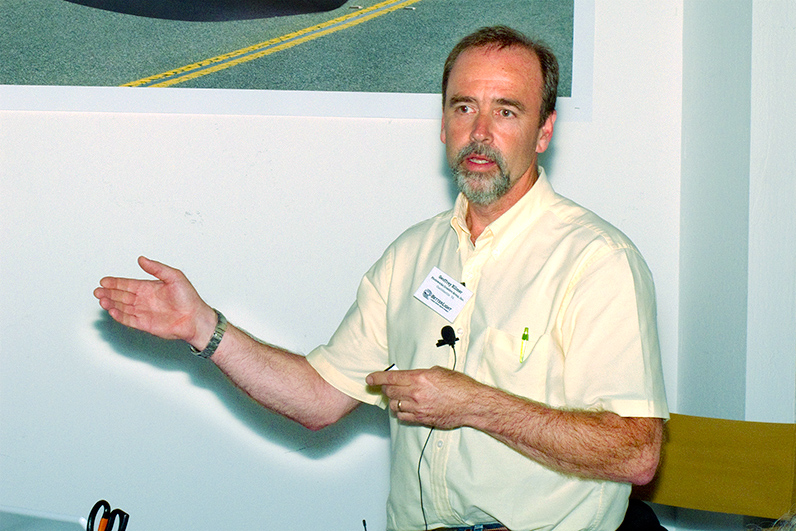
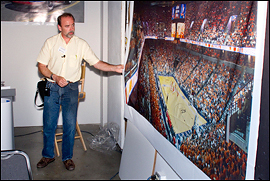
Download the presentation for more information on cross-polarization (PDF 9.6 MB). MARK VANDERSYS Pixel Light Digital Imaging, Boise, ID Inspired by an Owners Conference presentation several years ago, Mark purchased a Pano/WideView adapter for his scanning back and began experimenting with landscape and fine art panoramas. When Mike Collette introduced the concept of "Spinouts" at the 2008 Salem Conference, Mark immediately challenged himself with this new creative technique. The experimentation has turned to sales and new client jobs...Mark has become a true practitioner of the art of "Intentional Misuse" (see Better Light web home page). The Pano Adapter was primarily created to capture up to a 360 degree Scene Panoramas as a single unspliced image by rotating the camera around the nodal point of the lens and maintaining the image sensor in a stationary VERTICAL position in the center of the lens. An alternative use was for Rollouts, mounting the camera in a stationary position and use a platform on the Pano Turntable to rotate a cylindrical object in front of the lens making a continuous two-dimensional image as the object revolves — like peeling the label off of a coffee can. The third use was to make multiple scans of an image on the turntable as it turned at designated intervals. The sequence of images can be used to create a 3-dimensional Object Movie showing all sides of the image as the image rotates. The Spinouts are a modification of the Rollouts except the scanning back is placed in the camera so the sensor is HORIZONTAL. By placing objects on the turntable unusual abstracts are created. Varying subjects and their position on the turntable can create interesting distortions and colors that can be previewed with a short prescan before making a high resolution scan. Mark explained many of the variables and opportunities for experimentation that Spinouts provide. He continued with a very interesting variation of the Rollout technique using a cylinder of tiny rolls of paper (everyone wondered who was crazy enough to create hundreds of tiny paper rolls and glue them to the surface of this translucent container). See Mark's presentation for more details (PDF 15.4 MB) of this setup that created a bazaar visual illusion in this rollout. A project for Hewlett Packard came up that stimulated yet another variation in the role of the Pano Adapter — the Dragout. A trip to Home Depot provided most of the parts required to make a big pulley system that would be powered by the Pano Turntable motor and pull a stage with the subject in front of the stationary camera lens and VERTICAL sensor position. HP came to Mark to create several photographs that they could output on their printers at 9 ft. x 40 ft. (that’s a 3.5 GB file at 150 ppi)! “My experimentation with the Pano adapter was invaluable,” Mark admitted “It was not that difficult to come up with the Dragout techniques to create a linear scan of these large “G” scale model trains that HP’s creative director wanted to photograph.” GRANT KERNAN AK Photos, Cowichan Bay, BC Canada How do you know you have perfect sharpness? Grant has many years of experience in art reproduction with film and the scanning back. He has always pursued perfection and has found that the Better Light back provides a means to come very close to that goal. We all appreciate the high-resolution the Better Light scanning back provides…and for all of the benefits of showing extraordinary details in the subject, it also pushes all of our mistakes right in front of our eyes. The extreme magnification of the image on our monitor has made us all question our focus precision at one time or another. Consider our level of inspection of a Better Light image compared to the film days when we viewed our transparency with a $20 8X plastic magnifier…a 24x20 original captured at 300 ppi is being viewed as a 100 inch wide image at 72 ppi from just 18” away! No wonder we question our sharpness! “Our workflow needs to be perfect,” Grant begins, “with the increased competition and the many alternatives in capture devices, we must always be performing at the top of our game. Let two or three details suffer and now we may only be achieving 50% of our potential quality results”. In the days of film, Grant would not strike the setup until he had examined dry film. With the Better Light, even when using the Zig-Align systems, he still needed to re-scan too much. That’s when he started taking a good hard look at the whole process. “It’s all about balance”, Grant cautioned. “Any change of the weight distribution over the balance point of the tripod head will throw off the alignment. Just changing the lens can alter the weight distribution on the camera and teeter-totter the assembly out of alignment. Even little things like supporting the scanner cable above the camera can keep it from hanging loose and pulling down on the camera,” he added. Grant pointed out that the full weight of the camera assembly (27 pounds in his case) is balanced on the base of the tripod that is only 3/4-inch in diameter. Even the most expensive tripod headsneed to have some slack in the gear assembly to work and can potentially throw the camera out of alignment. The best procedure is to have your camera completely set up the way you need it before your Zig-Align. Other cautions included camera rails, lens boards and camera zero-detents. Many cameras use modular add-on monorails to accommodate different bellows extension. When joining sections together they may not be perfectly machined, so if a standard crosses over to another rail section, you will need to Zig-Align once again. Try to keep your standards on the same rail section to minimize problems. We have all been tempted to grab any old lens board to mount the Zig-Align round mirror. It is the surrogate for your camera lens board, so it must be of equal flatness and fit into the lens standard accurately. “The ZP4 Mirror Plate is a brilliant design concept by Bill Ziegler of Zig-Align. It is the same weight and size of the scanning insert to exert the same force as the Better Light back, minimizing problems with my teeter-totter balance”, Grant noted. The lens weight must also be accounted for. See the Tips page for Grant's solution (PDF 1.8 MB). Then there are the detents on the camera that were manufactured for the (wide) tolerances of sheet film. Rarely are they accurate enough for precision alignment of the scanning back. Inevitably, when Zig-Aligning the camera movements are riding on the edge of the ball bearings or notches creating the zero-detent of the camera body. The best solution is to remove them…if possible dismantle the camera enough to get access to any obstruction for your alignment procedures. So Grant…when do you know you have optimum focus and alignment? “It’s quite simple when you think about it” Grant explained “I know I have the best possible focus and alignment when I almost don't need to sharpen the image at all. You can use less unsharp masking...you'll know it when you see it!" JOHN MORSE Tensador, Melbourne, FL John is the manufacturer of the “Tensador II” Canvas Stretcher. He came to the Conference to participate in Randy Hufford’s Saturday Printing Class and since so many of the attendees are now printing their work we wanted to share this unique product with the entire group. The first “Tensador II” machines were delivered in 2001 as the only commercial quality machine to stretch canvas in all forms including giclées, canvas transfers, original oils and raw canvas. The unique pneumatic clamping mechanism firmly grips the canvas and insures proper and uniform tension on the canvas. If you do a lot of work with canvas, you should learn more about this machine at www.tensadorii.com. WRAPPING IT UP… Mike Collette spent some time at the end of the day on Friday to review some technical issues, troubleshooting tips, plus questions about parts & service, and on-going support. Considering the problems we had this year to build attendance the question was raised if the Conference should be held every two years…but the immediate and unanimous vote was to keep it an annual event. We couldn’t ask for a better response. On behalf of Mike Collette, the Better Light staff and all of this year’s attendees, I would like to thank our speakers for taking the extra effort to prepare presentations and share their work and business practices with us. This kind of information is just not available in other seminars or conventions, and we are very fortunate to be able to have this opportunity once a year to pickup new ideas and get motivation to try something new that can increase the success of our businesses. So folks, watch for announcements in early 2011 for next year’s event. We will all hope for a continued improvement in the economy and customer appreciation for the capabilities of the Better Light scanning back so we can have a full house for the 10th “Almost Annual” Better Light Owners Conference in mid-2011. Watch the Better Light Users Forum for next year's Conference information
Copyright 2007-10 Better Light, Inc. All Rights Reserved.
|
|
||||||||||||||||||||||||||||||||||||||||||||||||||||||